Taking an Order using Product Image Campaigns
This Quick Help Guide shows you how to take an order using the product image presentation mode on the iPad.
Tap the 'Retailer' Icon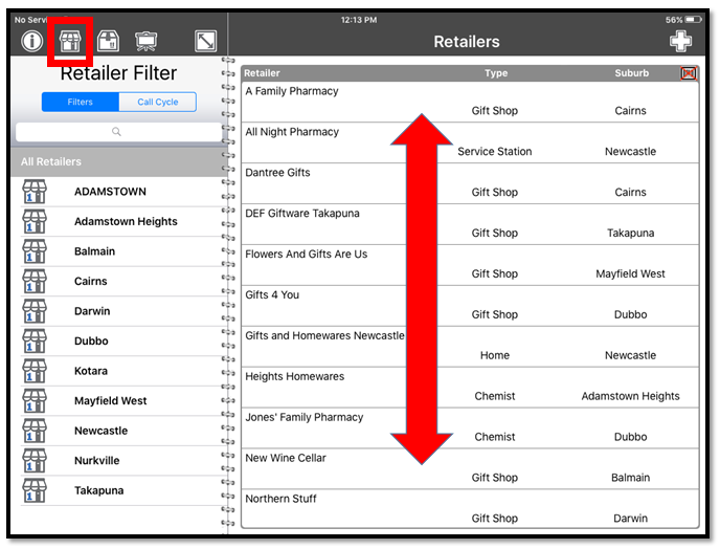
Find the
required Retailer
using the filters
or search on
Suburb or Name. If you are using the 'Call cycle' filters instead, your retailer will appear in the Call order sequence on the day they should be called on.
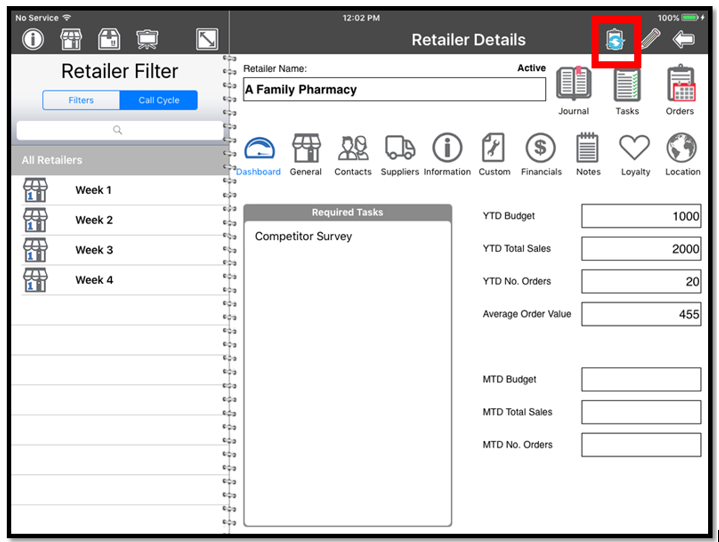
Tap on the name of the Retailer that is taking the order to open it.
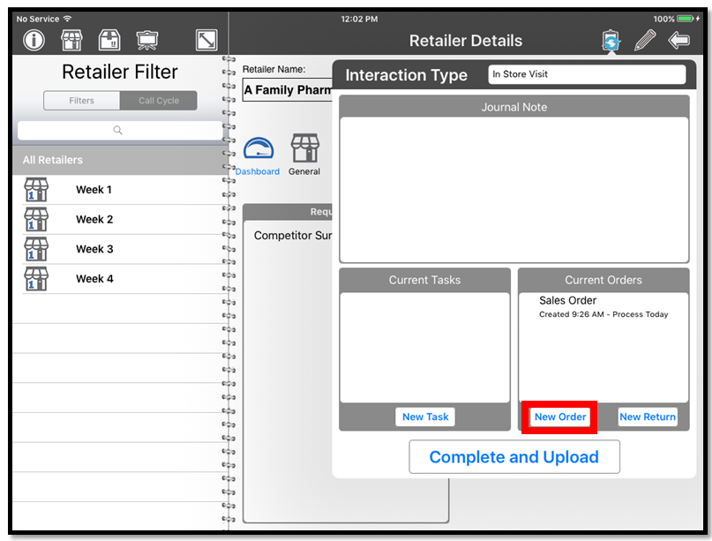
Tap the 'Interaction' Button
A pop up will appear giving you options for New tasks or Orders, Tap on the 'New Order' button
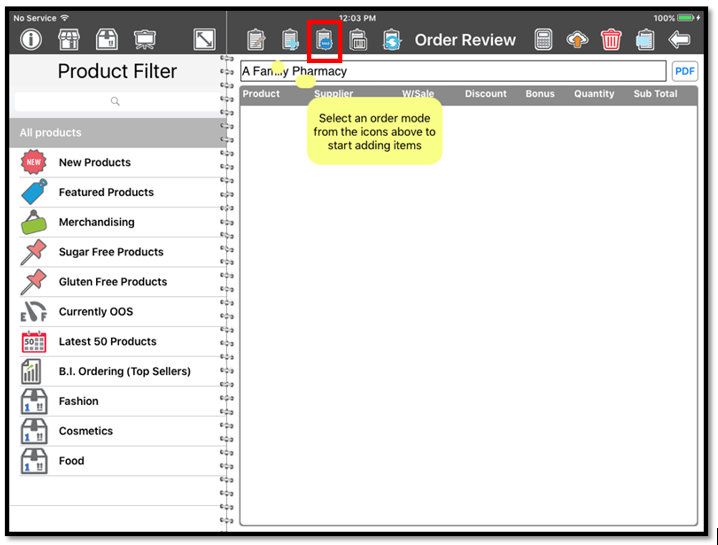
Tap the Campaign Icon highlighted
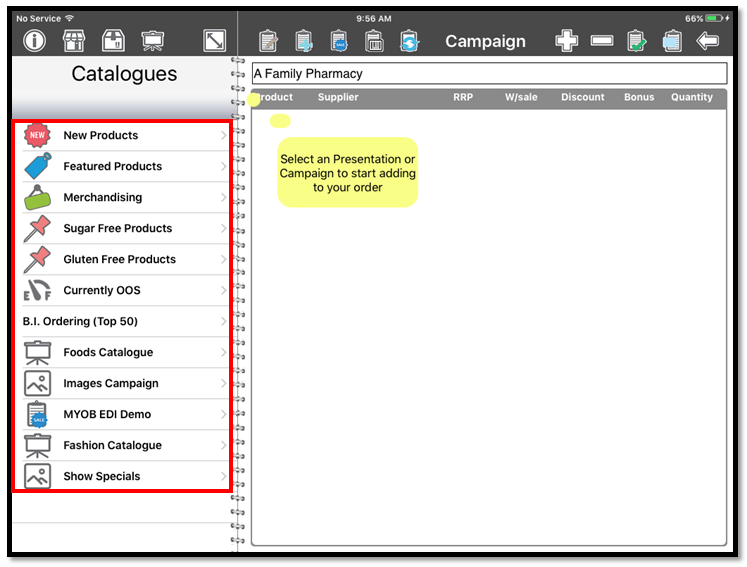
Open the Campaign you would like to order from (you can easily change between campaigns at any time).
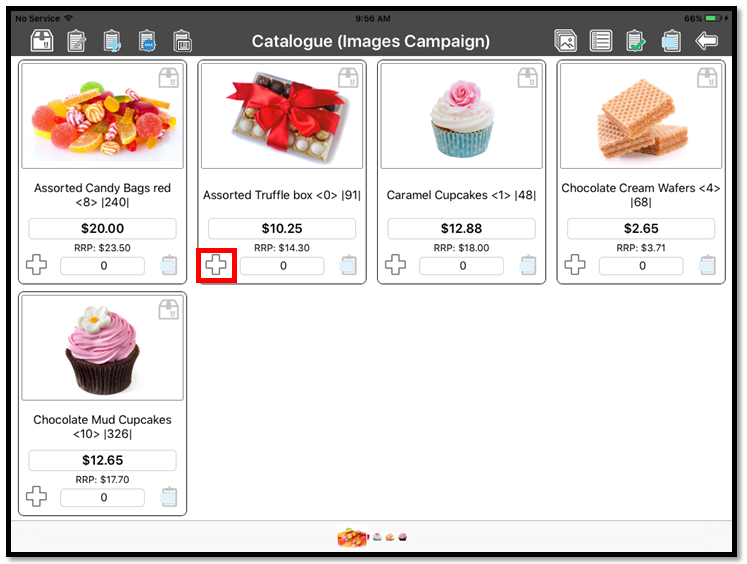
From here you can:
- See the Product Name, Price, RRP & Image.
- Add a note against a
Product using the Note icon (bottom right of each product panel)
- View the Product Details popup using the Product Icon (top right of each product panel)
- Add the items
to the Order by tapping the 'Plus" icon, or tapping the quantity box and manually typing your desired quantity.
From the Image
Presentation Swipe
across on the page to
scroll between pages.
Or tap the Desired
Product from the list of thumbnails at the bottom of the screen to jump to that page.
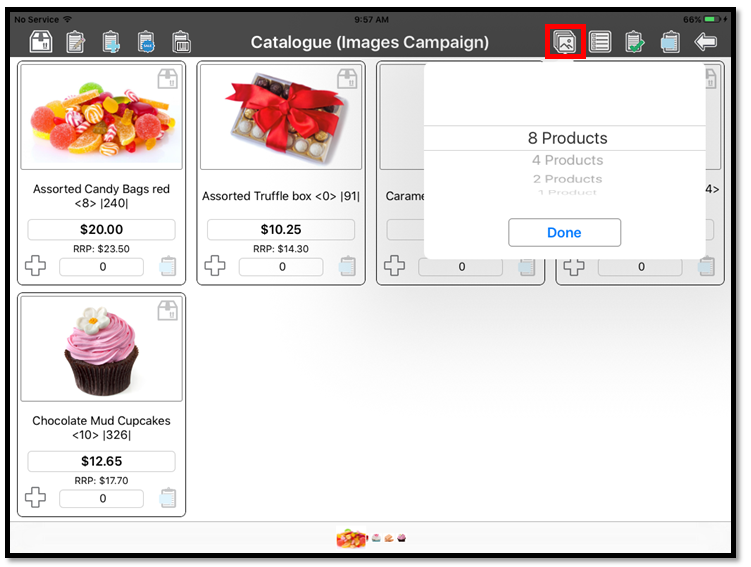
To view the screen with a different number of products showing per page, tap this icon to change number shown per page. Select either 8, 4, 2 or 1 and then Tap done.
Alternatively you can just scroll through the campaign in 8 per page, and when you want to view a product in greater detail double tap on the product's image to expand to full screen (1 per page), and then when finished double tap on the image again and it will return back to 8 products per page.
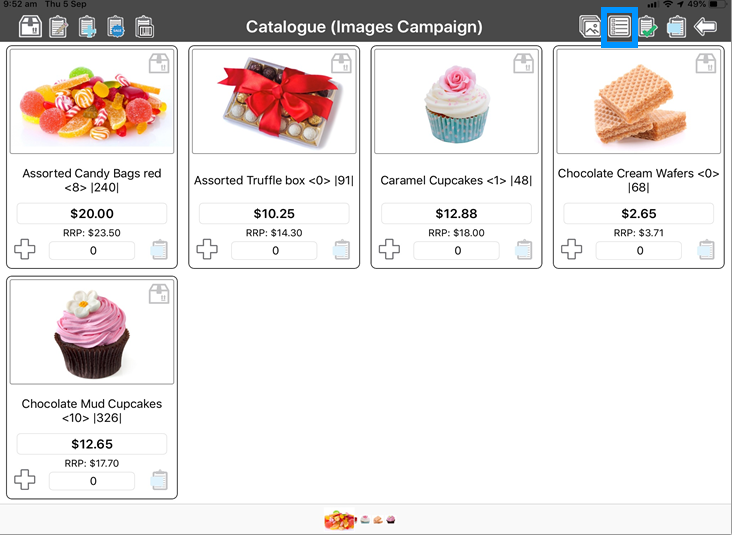
To swap between image presentations (or other campaigns), tap the "list" icon (shown below) to return to the Campaigns list screen.
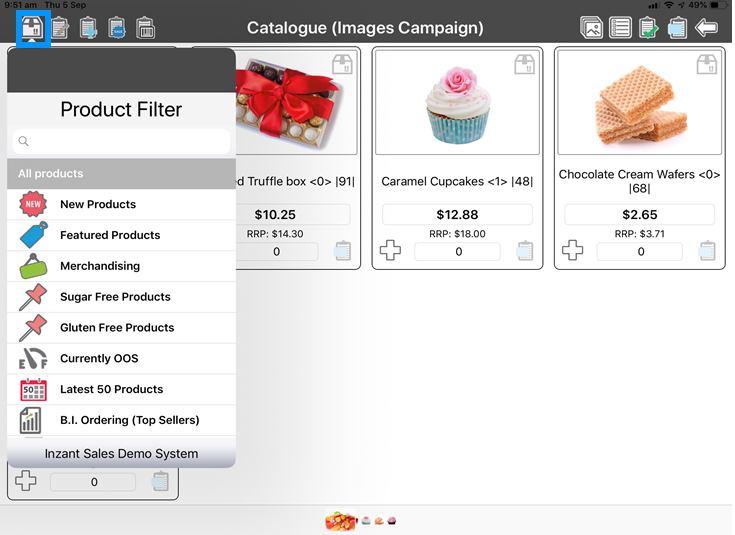
To easily swap across to viewing an image presentation of a product category or a product search, just tap the Product icon in the top left of screen (shown below). This will open a popup where you can select what you'd like to view.
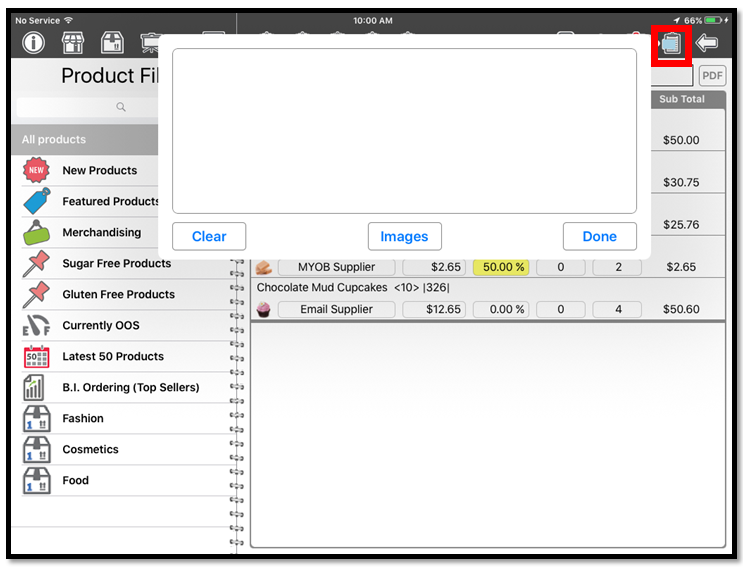
Tap this icon to leave an order note if required, then press done.
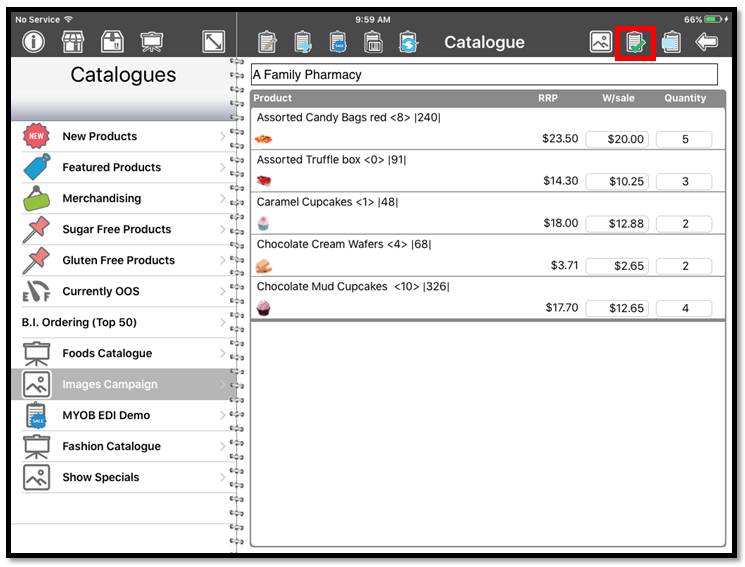
Tap this icon and you will be directed back to 'Order Review Screen'
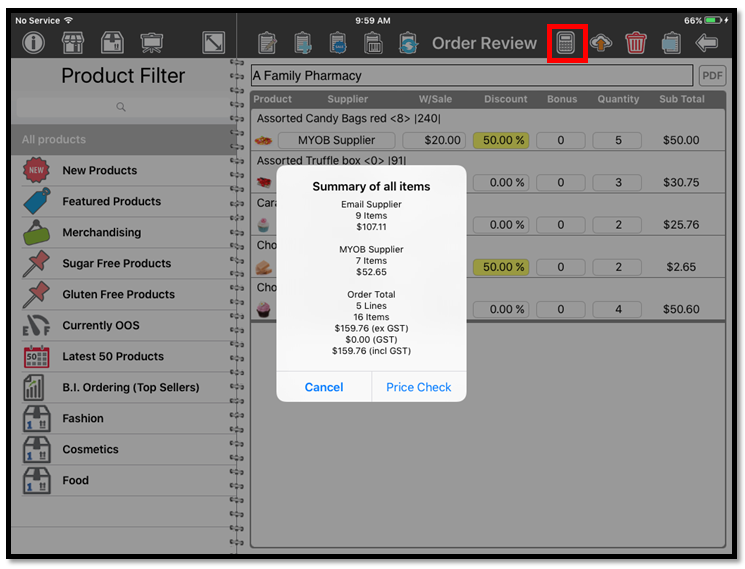
Tap the Calculator at the top right to get a 'Summary of all the items". It shows how many products you have ordered and whether they are coming from an Email supplier or Myob supplier.
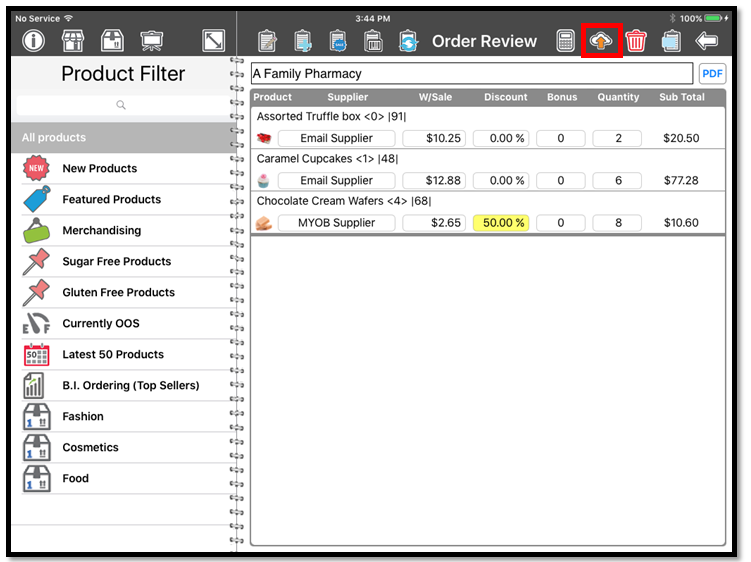
Tap this icon to send your order off to the 'Cloud'
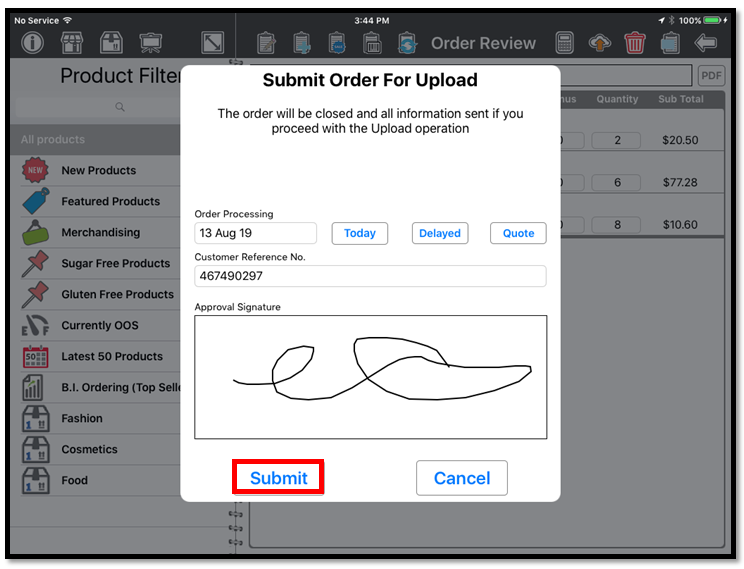
On this screen you can;
- Upload the order as a future dated order (or "indent" order) by tapping "Delayed" (and entering a future processing date)
- Submit the order as a quote by tapping "Quote"
- Submit the order as a normal Sales Order by tapping "Today" (which will be processed instantly)
- Capture a Customer Reference Number (not required)
- Capture a Customer Signature (not required)
When you have completed this process, Tap the 'Submit' button.
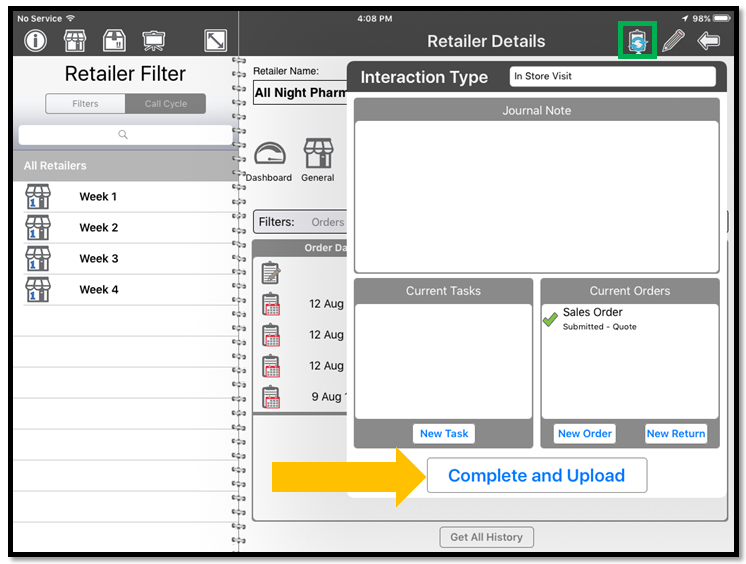
The order is now complete , to upload to the cloud Tap 'Complete and Upload' button on the interaction.
If
you'd like to do additional orders, tasks or capture a journal event
whilst in the same call, feel free to complete all those on the same
interaction, and Tap 'Complete and Upload' at the end of the call.
Related Articles
Taking An Order Using Item Image Display Mode
This is a quick guide on taking an order using 'Image Display Mode' To start your order, Tap the interaction button highlighted in the top right of the screen, Next tap 'New Order'. Next select the Order Mode you would like displayed, Select the ...Taking an Order using a Campaign
This Quick Help Guide shows you how to order items using the "Campaign mode". Open The Inzant Sales Plus App, Tap the 'RETAILER' icon and pick your Retailer from the list. You can refine the list of retailers using the search bar or filters in the ...Building and Editing a Campaign
This Quick Guide will show you how to Build and Edit a Campaign from the Inzant Sales Management Portal. To navigate to the Campaign Search screen Click Campaigns in the Side Bar Menu Screen Layout If you wish to Edit an existing Campaign, Click the ...Taking an Order on the iPad using Add Items order mode
This guide will show you how to take an Order on the iPad using the Add Items order mode. To get started, tap the Retailer icon, then select the Retailer you'd like to raise the order on. To begin an order, tap the Interaction icon. Now tap the 'New ...Taking an Order from the Inzant Sales Plus App / iPad
This Article shows how to Take an Order from the Inzant Sales Plus App. Open the Inzant Sales Plus App on your device, Tap the Retailer Icon highlighted to select the Retailer you would like to start an order for. Select the “Retailer” in the list ...
Popular Articles
Home Screen and Navigating the System
The Home Screen The home screen is the start up screen for the App. It contains links to all the other major screens and provides some KPI information and access to your schedule. In this article we will discuss all the links so you can navigate ...Editing a Retailer
This article describes the process of editing a retailer. More detailed information on retailer information can be found at the following article (Retailer Detail Screen) To Edit a Retailer touch 'Retailers' on the left of the Home Screen. Touch the ...Order History Search Screen
The Order History Screen allows you to review history and report on ordering processes. This article describes how to use the Order History screen. Online Help The help link will provide you with online access to our knowledge base with the articles ...Quick Guide Reporting - Customer Website Access Status
To get a list of your existing Retailers & Contacts with the state of their website access you can run a simple report from the Management Portal Reporting Module Click on Reporting in the Side Bar Menu to see the available reports. Click the Website ...Master and Variation Products
Inzant Sales supports Master and Variation products. these products appear in the App slightly different to normal products. This article describes how Master and variation products are displayed in the App. When viewing product lists, on the Product ...
Recent Articles
End to End Video Guide on Using Smart Catalogues
We've put together a pretty comprehensive video on using Smart Catalogues here, which covers the salesperson user experience (and how to edit that if you wish), how to create the PDF, and then how to create the smart catalogue in Inzant Sales. If you ...Management Portal - Adding a Pricing Rule Walk Through Video
Watch the linked video as we walk through creating a new pricing rule, set conditions for discounts, select products, choose applicable price lists, and schedule the rule for auto-publishing. Check out the detailed steps and explanations below to ...Performing a Hard Reset on an iPad
Adding a Favourites List to a Retailer
In this video, I will show you how to add a favourites list to a retailer. I will guide you through the steps, including selecting the retailer, navigating to the favourites section, and adding a list. I will also explain how to choose the contact ...Accessing and Managing Favourites Lists
In this video, I will show you how to access and manage your favourites lists on our platform. I will guide you through the steps to access your favourites list, apply filters, and view specific categories. Additionally, I will demonstrate how to add ...